How to Create a Data Entry Form in Excel
Step by step guide to building a data entry form in Excel, plus when it's time to move beyond spreadsheets to a real no code app.
Excel has a built in data entry form that most people have never seen. It is hidden by default, which is why so many teams end up typing directly into spreadsheet cells instead of using a cleaner, more controlled input method. This guide walks through how to set it up, two ways to approach it, and when it makes sense to move to something purpose built instead.
What Is a Data Entry Form in Excel
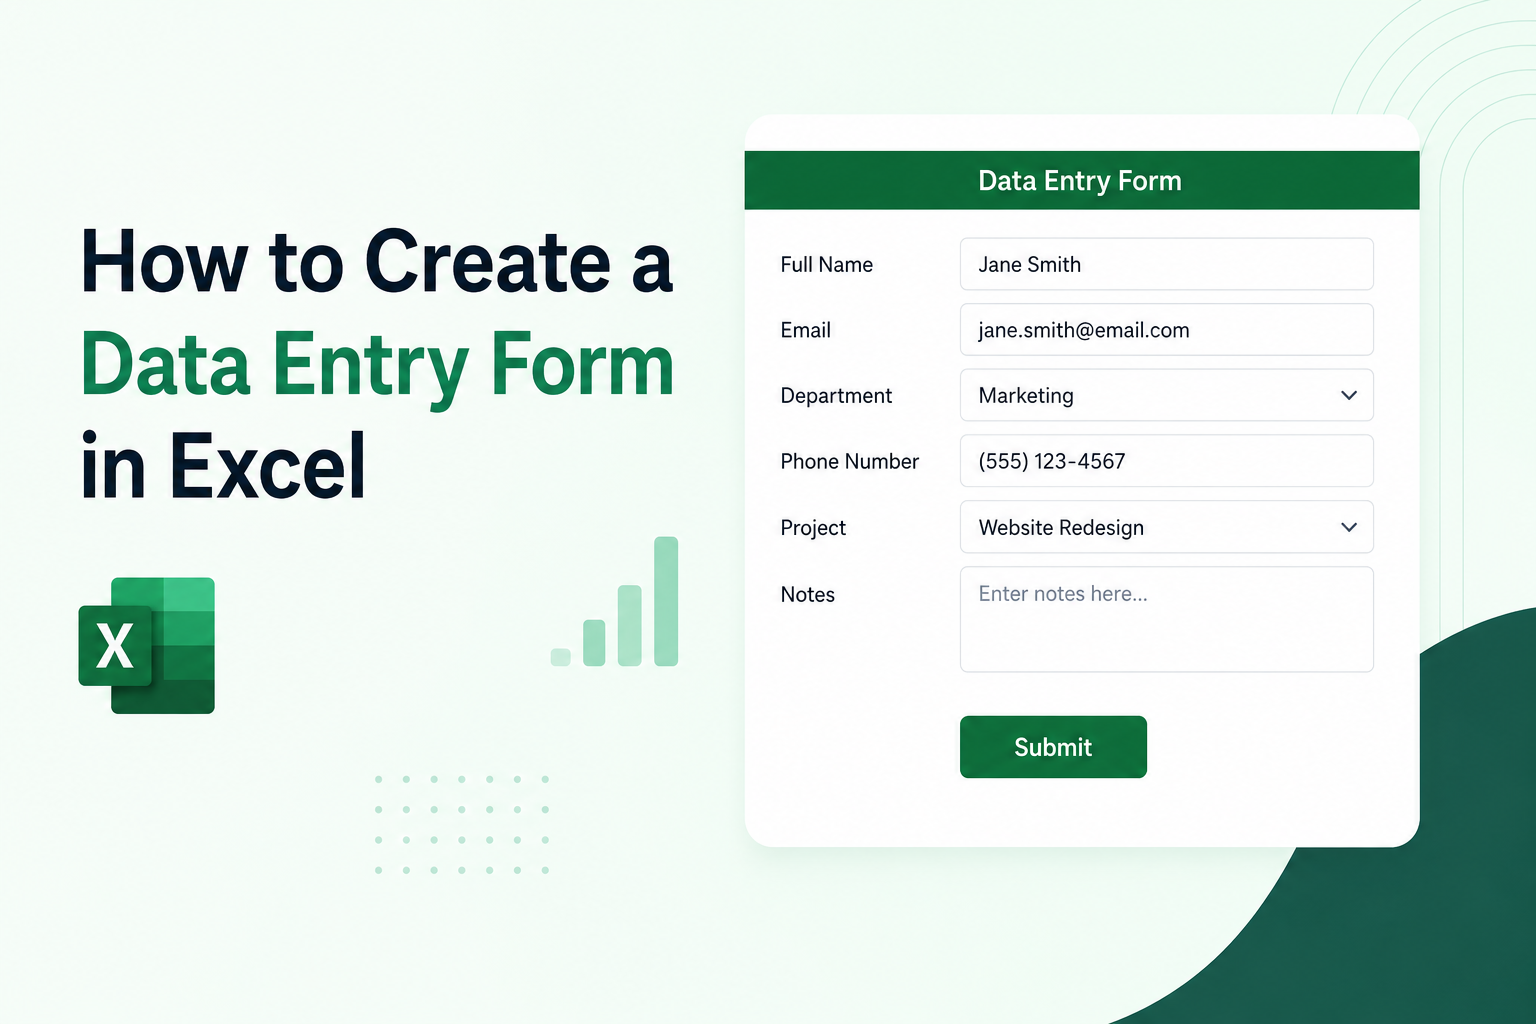
An Excel data entry form is a dialog box that displays one row of spreadsheet data at a time, with labeled fields for each column in the table. Instead of scrolling across a wide spreadsheet and clicking individual cells, a person can tab through a simple form, enter or update values, and move to the next record.
It is a native Excel feature, not a plugin or add on, and it works with any structured table in the spreadsheet.
What You Need Before You Start
Before enabling the form, the spreadsheet needs to be set up correctly.
The data should be in a structured table format, meaning each column has a header in row 1 (such as Name, Date, Amount, Status), and the data rows begin directly below. The form pulls its field labels from these headers, so clear, descriptive column names produce a cleaner form.
Excel supports up to 32 fields in a data entry form. If the table has more than 32 columns, the form will only display the first 32.
How to Enable the Excel Data Entry Form (Built In Method)
Excel's data entry form is accessed through the Quick Access Toolbar, since it does not appear in the default ribbon.
- Open Quick Access Toolbar settings. Click the small dropdown arrow at the top left of the Excel window (next to the undo and redo buttons). Select "More Commands."
- Add the Form command. In the "Choose commands from" dropdown, select "All Commands." Scroll down to find "Form" in the alphabetical list. Click it, then click "Add" to move it to the Quick Access Toolbar. Click OK.
- Click inside your data table. Click any cell inside the structured table or data range before opening the form.
- Click the Form button. Click the Form button that now appears in the Quick Access Toolbar. A dialog box opens with one field for each column header in the table.
- Use the form. Click "New" to add a new record. Fill in each field and press Enter or click "New" again to save the record and start a new one. Use "Find Prev" and "Find Next" to scroll through existing records. Click "Delete" to remove the current record. Click "Close" when finished.
The data entered through the form writes directly back into the spreadsheet table.
How to Create a Manual Data Entry Form in Excel Using a Separate Sheet
Some teams prefer a more visual form layout, with labels, input cells, and a submit button, rather than the dialog box approach. This method takes a bit more setup but gives more control over the layout.
- Create a form sheet. Add a new sheet to the workbook. Label it "Form" or "Data Entry."
- Design the layout. In this sheet, create labeled input areas. For example, put "Name" in cell B2 and leave C2 blank for input. Put "Date" in B3 and leave C3 blank. Continue for each field needed.
- Create a data sheet. Add a second sheet called "Data" with the same column headers as the fields in the form sheet.
- Add a submit button using a macro. Go to Developer tab (enable it in Excel Options if not visible), click Insert, and choose a Button from the Form Controls section. Draw the button on the form sheet and assign a new macro to it.
- In the macro editor, write a short VBA script that reads the values from the input cells on the form sheet and pastes them as a new row in the data sheet, then clears the input cells. This is the one part of this method that requires a small amount of code, though standard templates for this are widely available online.
- Test the form. Fill in the input cells and click the button. The data should appear as a new row in the data sheet.
Limitations of Excel Data Entry Forms
Both methods work, but they come with practical constraints worth knowing before investing too much setup time.
The built in form dialog is functional but not customizable. There is no way to add dropdown menus, conditional logic, required field validation, or custom layouts through the form dialog itself.
The manual sheet method with a macro button gives more flexibility, but it requires some VBA knowledge to set up and maintain, and macros can cause issues with shared workbooks or when a file is opened on a machine where macros are disabled.
Neither method makes it easy to share the form with someone outside the workbook. If the goal is to let a team member or external user submit data without accessing the spreadsheet directly, Excel forms become difficult to manage.
When a No Code Tool Is a Better Fit
Excel data entry forms work well for single users managing their own data in a local or shared workbook. They become harder to manage when:
- More than one person needs to enter data at the same time, since Excel's shared workbook handling can cause conflicts.
- The form needs to be shared with people who should not see or edit the full spreadsheet.
- The data needs to feed into a dashboard, tracker, or report that updates in real time.
- Validation, dropdown menus, conditional logic, or required fields are needed without writing macros.
In these situations, a no code tool that connects directly to the Excel spreadsheet, without requiring a migration, can give the same outcome: a clean, controlled data entry form that writes back to the existing spreadsheet, visible to the right people, accessible from a browser without needing to open Excel.
See How to Turn a Spreadsheet Into an App Without Code for a broader look at how this works.
Frequently Asked Questions
Related Topics
Build Your Internal Tools With Huddle
Huddle is a zero code application builder that connects to Google Sheets, Airtable, Excel 365, HubSpot, and Salesforce without requiring data migration. Build dashboards, forms, and portals with drag and drop widgets and publish to a shareable link in minutes.
Start building with Huddle